Lemon Meringue Pie


Serves 12
Time: 4 h
~ low FODMAP ~ failsafe ~ low salicylate ~ low amine ~ dairy free ~ gluten free ~

Ingredients – Base

190 g Nuttelex Original
1/4 tsp vanilla essence (a)
3/4 cup brown sugar
1 1/2 tbsp golden syrup (b)
215 g Orgran gluten free plain flour
1/4 tsp salt

Ingredients – Lemon curd

2 cups water
1/2 cup white sugar
5 tbsp gluten free cornflour (c)
5 gelatine leaves (d)
1 tbsp Nuttelex Original
3 egg yolks

Ingredients – Meringue

3 egg whites
1/2 cup caster sugar
pinch salt
1 tsp gluten free cornflour (c)

Foodnotes

(a) Vanilla essence should not contain any preservatives – Queen’s Natural Organic Vanilla Essence is one suitable product but the Queen’s Natural Vanilla Extract is NOT failsafe as it contains preservative 202. Vanilla essence is failsafe at 2 drops per day (Food Intolerance Network Website, 2018)
(b) Golden syrup is low FODMAP at 1/2 tbsp (7g, The Monash University Low FODMAP Diet App, 2018)
(c) Use gluten free cornflour, also known as cornstarch, which is a fine white flour. Corn flour from wheat contains wheat and gluten while yellow corn flour or maize flour is higher in salicylates.
(d) Use gelatine without preservatives or additives. If you are sensitive to gluten, choose a gelatine that is gluten free. I used Sliver Grade Bio-Organic edible leaf gelatine but other grades should work.

Instructions – Base
  1. Preheat oven to 180 deg C
  2. Beat Nuttelex, vanilla essence, brown sugar, salt and golden syrup together
  3. Sift in Orgran gluten free flour
  4. Mix until uniform consistency
  5. Press mixture evenly onto base and sides of a large pie dish
  6. Bake the base for 20 mins at 180 deg C
Instructions – Lemon Curd
  1. Soak gelatine leaves in ice-cold water for 2 minutes
  2. Squeeze water out of the gelatine
  3. Separate the eggs into whites and yolks
  4. Combine 1 cup of water, white sugar and citric acid in saucepan and bring to the boil
  5. Make a slurry with 2 tbsp of water and cornflour
  6. Add cornflour slurry, remaining water (2 tbsp less than 1 cup) and gelatine to the water, sugar and citric acid mixture
  7. Stir the mixture continuously until it thickens
  8. Take the mixture off the heat and after a couple of minutes, stir in Nuttelex and egg yolks
  9. All the curd to cool slightly and then pour into cooked pie base
Instructions – Meringue
  1. Mix together caster sugar, salt and cornflour
  2. Beat egg whites to a soft peak with an electric mixer
  3. Add sugar mixture, one dessert spoon at a time, beating well after each addition to give glossy peaks
  4. Float dollops of meringue mixture onto lemon curd to cover the surface
  5. Using a spatula, spread the meringue over the surface and make small peaks
  6. Bake lemon meringue pie for 15 mins at 180 deg or until meringue is lightly browned
  7. Cool to room temperature and then refrigerate for a minimum of 2 hours to allow lemon curd to set
  8. Keep refrigerated before serving
Personal Notes

This recipe is adapted from the lemon meringue pie and butterscotch biscuits recipes from Sue Dengate’s The Failsafe Cookbook. If you can tolerate more than 2 drops of vanilla a day, the pie goes well with So Good vanilla frozen dessert.

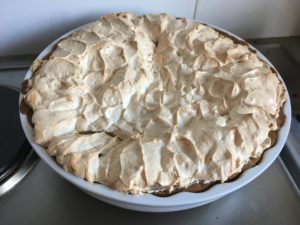
I have made lemon meringue pie twice – once for a New Years Eve party and once when going to a friend’s place for dinner, which was then finished off by work colleagues – it has been very well received every time! Most people seem quite amazed that there aren’t real lemons in it and that it is gluten free. It is very sweet though, so I’d recommend making it for an event where it can be shared.

My current conundrum with this dessert is that I want the crusty meringue that comes from keeping the meringue dry but the firm lemon curd that requires cooling in the fridge. I tried slowly cooling it in the oven which made the crusty meringue, but as soon as I put the pie in the fridge, the condensation made the meringue soften. In a chemistry lab this would be an easy fix – put the sample in a flame-dried piece of glassware under a nitrogen atmosphere before cooling it and then there is no water present in the air to condense! The kitchen is a bit more difficult. I would like to try allowing the pie to cool completely to room temperature in the oven and then putting it in an airtight container in the fridge but there may be too much liquid in the pie for that to work and I can’t try it as my largest container doesn’t fit the pie dish. A much easier solution would be to find a different setting agent (also low FODMAP and failsafe!) that sets at room temperature. For now a soft meringue and set lemon curd is tasty enough.
Coffee and Carob Cake


Time: 1 hr
~ low FODMAP ~ failsafe ~ low salicylate ~ low amine ~ dairy free ~ gluten free ~

Ingredients

Cake
125 g Nuttelex Original
2/3 cup brown sugar
1/3 cup caster sugar
1/2 cup SoGood soymilk
2 tsp decaf instant coffee powder
1 tbsp carob powder
2 eggs
1 1/2 cups Orgran gluten free flour

Icing
1 cup pure icing sugar
2 tbsp Nuttelex Original
1 tbsp SoGood soymilk
1/2 tsp decaf instant coffee powder

Instructions
  1. Preheat oven to 180 deg C
  2. In a large saucepan, combine sugars, Nuttelex, soymilk, decaf instant coffee powder and carob powder
  3. Stir on low heat until Nuttelex has melted
  4. Allow mixture to sit for 10 mins
  5. Add flour and eggs to the mixture and mix together, first using a wooden spoon and then an electric mixer. The batter should be thin and smooth
  6. Line a square or circular cake tin with baking paper and grease the sides with Nuttelex
  7. Bake for 35 min at 180 deg, or until a skewer inserted into the cake comes out clean
  8. Sift 1 cup of pure icing sugar and mix in 2 tbsp Nuttelex
  9. Heat 1 tbsp of soymilk in the microwave on low heat
  10. Dissolve 1/2 tsp decaf instant coffee powder in soymilk
  11. Slowly add coffee soymilk to icing and Nuttelex mixture until icing reaches the desired consistency, add more soymilk if required
  12. Once the cake has cooled to the touch, ice with coffee icing
Personal Notes

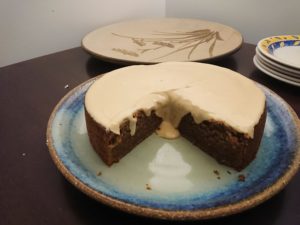
This cake is based off the melt and mix coffee cake in Sue Dengate’s The Failsafe Cookbook. The carob gives a slight spicy taste and adds interest to the flavour of the cake, and carob powder is low FODMAP at 1 heaped tsp, or 6 g (The Monash University Low FODMAP Diet App, 2018) so as long as you don’t consume more than 1/4 of the cake in one sitting, it will be low FODMAP! It is so good you might want to though! I like this cake best when it is cooked but still moist inside, rather than the drier, crumbly texture of some cakes. I made this cake for my housewarming party along with the lemon and poppy seed cake and it was also demolished in record time.

Lemon and Poppy Seed Cake

Time: 1 hr
~ low FODMAP ~ failsafe ~ low salicylate ~ low amine ~ dairy free ~ gluten free ~

Ingredients

Cake
175 g Nuttelex Original
3/4 cup white sugar
1/2 tsp citric acid
3 eggs
1 1/2 cups Orgran gluten free self-raising flour
1 tsp xanthan gum
1 tsp gluten free baking powder
1 tbsp poppy seeds

Icing
1 cup pure icing sugar
2 tbsp Nuttelex Original
1 tbsp hot water
1/2 tsp citric acid

Instructions
      1. Preheat oven to 180 deg C
      2. Cream Nuttelex and sugar until light and fluffy
      3. Add 1/2 tsp citric acid to the Nuttelex and sugar
      4. In a second bowl, beat eggs until frothy, idealling using an electric mixer
      5. In a third bowl, sift together flour, xanthan gum and baking powder
      6. Add egg and flour mixtures alternately to Nuttelex and sugar, using a wooden spoon to mix. The final mixture should be very thick.
      7. Stir poppy seeds through batter
      8. Line a rectangular cake tin with baking paper and grease sides with Nuttelex
      9. Spoon the batter into the cake tin and spread out with a spatula. The mixture should be firm and have to be pushed into place
      10. Bake for 40 mins at 180 deg C. A skewer inserted into the cake should come out dry
      11. Leave the cake in the tin for 10 mins, before cooling on a rack
      12. Sift 1 cup of pure icing sugar and mix in 2 tbsp Nuttelex
      13. Dissolve 1/2 tsp citric acid in 1 tbsp boiling water
      14. Slowly add water to icing and Nuttelex mixture until icing reaches the desired consistency. Usually the whole tbsp of water is required
      15. Once the cake has cooled to the touch, ice with citric icing
    Personal Notes

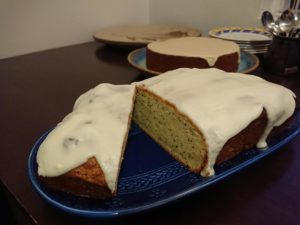
    This recipe is based off the Madeira Cake in Sue Dengate’s The Failsafe Cookbook, which is one of my all-time favourite cake recipes. I’ve tried to make this cake slightly more lemon-flavoured and of course I have added the poppy seeds too, as citrus (traditionally orange) and poppy seed cake is an old favourite. I made this for my housewarming party and it disappeared very quickly!

Buckwheat Pancakes


Makes 7 pancakes

Time: 1 hr 20 mins
~ low FODMAP ~ failsafe ~ low salicylate ~ low amine ~ dairy free ~ gluten free ~

Ingredients

225 g buckwheat flour
1 1/2 tsp gluten free baking powder
1 3/4 cups SoGood soy milk
2 eggs
1 pinch salt
1/4 cup Nuttelex Original
100% pure maple syrup

Instructions
    1. Beat soy milk and eggs together with a fork
    2. Combine buckwheat flour and baking powder
    3. Gradually sift flour mixture into soy milk and eggs mixture, mixing well.
    4. Add a pinch of salt to the mixture and stir.
    5. Cover the mixture and allow to sit for 1 hr.
    6. Heat 1 tbsp of Nuttelex Original into a frying pan on medium-high heat.
    7. Add one ladle-full of batter to the frying pan. Move the frying pan to spread the batter out thinly.
    8. Cook until the mixture solidifies around the edges, then flip the pancake over, adding one more Nuttelex to the pan. Cook until the pancake is golden on both sides.
    9. Continue cooking pancakes until all the mixture is finished.
    10. Serve with pure maple syrup.
Personal Notes

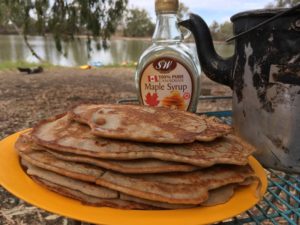
My family, and a few of our close family friends go on an annual camping trip, almost like a pilgrimage to the same campground each Easter. As the first year on the on failsafe + low FODMAP + dairy free + wheat free diets the challenge was to still be able to go camping without having to rely on my usual technique of freezing food. The solution was to go vegetarian for a few days, keep my own box of non-perishable food and a bag in the esky of perishable food.

These buckwheat pancakes were for for brunch but I often make them at home for breakfast, dessert, a snack (especially good when I come home hungry) or for a carbohydrate source to go with a pasta sauce. These were also enjoyed by my family who are on “normal” diets.