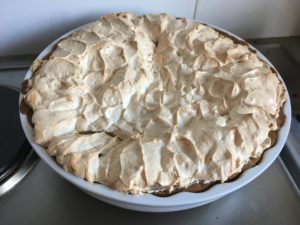
Lemon Meringue Pie


Serves 12
Time: 4 h
~ low FODMAP ~ failsafe ~ low salicylate ~ low amine ~ dairy free ~ gluten free ~

Ingredients – Base

190 g Nuttelex Original
1/4 tsp vanilla essence (a)
3/4 cup brown sugar
1 1/2 tbsp golden syrup (b)
215 g Orgran gluten free plain flour
1/4 tsp salt

Ingredients – Lemon curd

2 cups water
1/2 cup white sugar
5 tbsp gluten free cornflour (c)
5 gelatine leaves (d)
1 tbsp Nuttelex Original
3 egg yolks

Ingredients – Meringue

3 egg whites
1/2 cup caster sugar
pinch salt
1 tsp gluten free cornflour (c)

Foodnotes

(a) Vanilla essence should not contain any preservatives – Queen’s Natural Organic Vanilla Essence is one suitable product but the Queen’s Natural Vanilla Extract is NOT failsafe as it contains preservative 202. Vanilla essence is failsafe at 2 drops per day (Food Intolerance Network Website, 2018)
(b) Golden syrup is low FODMAP at 1/2 tbsp (7g, The Monash University Low FODMAP Diet App, 2018)
(c) Use gluten free cornflour, also known as cornstarch, which is a fine white flour. Corn flour from wheat contains wheat and gluten while yellow corn flour or maize flour is higher in salicylates.
(d) Use gelatine without preservatives or additives. If you are sensitive to gluten, choose a gelatine that is gluten free. I used Sliver Grade Bio-Organic edible leaf gelatine but other grades should work.

Instructions – Base
  1. Preheat oven to 180 deg C
  2. Beat Nuttelex, vanilla essence, brown sugar, salt and golden syrup together
  3. Sift in Orgran gluten free flour
  4. Mix until uniform consistency
  5. Press mixture evenly onto base and sides of a large pie dish
  6. Bake the base for 20 mins at 180 deg C
Instructions – Lemon Curd
  1. Soak gelatine leaves in ice-cold water for 2 minutes
  2. Squeeze water out of the gelatine
  3. Separate the eggs into whites and yolks
  4. Combine 1 cup of water, white sugar and citric acid in saucepan and bring to the boil
  5. Make a slurry with 2 tbsp of water and cornflour
  6. Add cornflour slurry, remaining water (2 tbsp less than 1 cup) and gelatine to the water, sugar and citric acid mixture
  7. Stir the mixture continuously until it thickens
  8. Take the mixture off the heat and after a couple of minutes, stir in Nuttelex and egg yolks
  9. All the curd to cool slightly and then pour into cooked pie base
Instructions – Meringue
  1. Mix together caster sugar, salt and cornflour
  2. Beat egg whites to a soft peak with an electric mixer
  3. Add sugar mixture, one dessert spoon at a time, beating well after each addition to give glossy peaks
  4. Float dollops of meringue mixture onto lemon curd to cover the surface
  5. Using a spatula, spread the meringue over the surface and make small peaks
  6. Bake lemon meringue pie for 15 mins at 180 deg or until meringue is lightly browned
  7. Cool to room temperature and then refrigerate for a minimum of 2 hours to allow lemon curd to set
  8. Keep refrigerated before serving
Personal Notes

This recipe is adapted from the lemon meringue pie and butterscotch biscuits recipes from Sue Dengate’s The Failsafe Cookbook. If you can tolerate more than 2 drops of vanilla a day, the pie goes well with So Good vanilla frozen dessert.

I have made lemon meringue pie twice – once for a New Years Eve party and once when going to a friend’s place for dinner, which was then finished off by work colleagues – it has been very well received every time! Most people seem quite amazed that there aren’t real lemons in it and that it is gluten free. It is very sweet though, so I’d recommend making it for an event where it can be shared.

My current conundrum with this dessert is that I want the crusty meringue that comes from keeping the meringue dry but the firm lemon curd that requires cooling in the fridge. I tried slowly cooling it in the oven which made the crusty meringue, but as soon as I put the pie in the fridge, the condensation made the meringue soften. In a chemistry lab this would be an easy fix – put the sample in a flame-dried piece of glassware under a nitrogen atmosphere before cooling it and then there is no water present in the air to condense! The kitchen is a bit more difficult. I would like to try allowing the pie to cool completely to room temperature in the oven and then putting it in an airtight container in the fridge but there may be too much liquid in the pie for that to work and I can’t try it as my largest container doesn’t fit the pie dish. A much easier solution would be to find a different setting agent (also low FODMAP and failsafe!) that sets at room temperature. For now a soft meringue and set lemon curd is tasty enough.
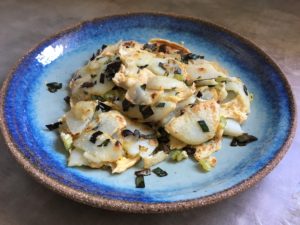
Fried Potato Omlette


Serves 1
Time: 15 mins
~ low FODMAP ~ failsafe ~ low salicylate ~ low amine ~ dairy free ~ gluten free ~

Ingredients

1 large white potato (a)
1 tbsp canola oil (b)
2-3 eggs
3 cm or 7 g celery (c)
25 g dark green tips of leek (d)
1 pinch citric acid
1 pinch salt

Foodnotes

(a) Use white brushed, coliban, sebago or kennebec potatoes, or other large white potatoes with white flesh. Check the colour before buying brushed potatoes because they can come in yellow.
(b) Use canola oil that has no antioxidants (no 310-312, 319-321)
(c) Celery is low FODMAP at 75 g (FODMAP Friendly App, 2018)
(d) Dark green tops of leeks are low FODMAP. They are also slightly higher in salicylates than the white part although suitable for failsafe elimination. Tip: re-grow the leeks.

Instructions
  1. Thickly (double) peel the potato and then slice thinly
  2. Rinse the dark green tips of leek and celery and chop finely
  3. Heat the canola oil in a large frying pan on high heat
  4. Fry the thinly sliced potato until all the potato has started to go transparent and some is lightly browned
  5. Add the green tips of leek, celery, salt and citric acid to the potato and cook until the celery begins to go soft
  6. While the potato is cooking, separate the eggs into whites and yolks
  7. Beat the egg whites until light and fluffy and then gently fold in the egg yolks
  8. Pour the egg mixture over the potato and spread evenly
  9. After a couple of minutes, flip the omlette
  10. When the egg is cooked through, remove from the pan and serve immediately
Personal notes

Usually the omlette falls apart in the flipping stage, probably because my frying pan is much larger than my egg flip, but even if it does, it will taste good.

This is my go-to meal when I’m short on time or resources, or cooking at someone else’s house. I’m actually surprised it’s taken me this long to get it up on the blog, but I guess I must have been more organised in the last few months! It’s good because the ingredients are things I almost always have in the house (especially now I grow my own leeks) and most of my family and friends have them too. If not, eggs and a potato are very easy to pick up at the shop. If citric acid and celery are not on hand, they can easily be omitted; likewise, if fresh chives are on hand, they make a nice addition. So the ingredients are readily available, it’s fast to cook and it’s filling – can’t ask for much more in terms of convenience! I most often have this for lunch on a Saturday morning when I’ve run out of food before doing the weekly shop, or as a light dinner if I’ve flown in late to visit my family and they haven’t had a chance to get to the butcher and buy some fresh meat for me.

I actually made this particular omlette a couple of weeks ago as I had a choir concert on in the evening and I wanted to bring a light dinner with me that wouldn’t require refrigeration for the day. I only managed one bite before the concert as everything was a bit hectic, but it was very welcome immediately afterwards. Because of the eggs, the omlette should be eaten the day it is cooked rather than as leftovers. Cooked eggs build up in amines if left for a day or longer.

This week I need to use up lots of eggs as one of my friends has given me some of her chooks’ eggs and I’m going away soon. I actually made quiche last week, so it might be too soon for another quiche, but perhaps some salads… Last time I tried to make an egg salad I decided to boil all the eggs at once and then freeze the last. I discovered that hard boiled egg whites do NOT freeze well. While the yolk maintains it’s original consistency, defrosted egg white turns rubbery and is quite unpleasant – an experiment that doesn’t need to be repeated. The quiche recipe won’t be appearing here any time soon either as I am liberalising some salicylates back into my diet and so the quiche was filled with high and moderate salicylate vegetables like jap pumpkin, zucchini, carrot and sweet potato (low FODMAP at 1/2 cup or 70 g, The Monash University Low FODMAP App 2018). It was delicious though, and I don’t seem to have reacted!

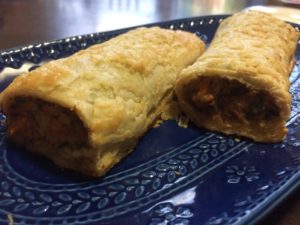
Sausage Rolls

Serves 8
Time: 45 mins
~ low FODMAP ~ failsafe ~ low or moderate salicylate ~ low amine ~ dairy free ~ gluten free ~

Ingredients

2 packets Genius gluten free puff pastry (a)
400 g fresh beef mince (b)
300 g fresh chicken mince (b)
Dark green tips of 1 large leek (c)
1 large choko (d)
1 tbsp dried chives
1 tsp salt
1 egg
2 tbsp SoGood soymilk
1 large carrot – moderate salicylate option

Foodnotes

(a) Genius gluten free frozen puff pastry can be found in some Coles supermarkets in Australia
(b) Ensure very fresh meat (as instructed by dietician)
(c) Dark green tops of leeks are low FODMAP. They are also slightly higher in salicylates than the white part although suitable for failsafe elimination. Tip: re-grow the leeks.
(d) Choko is also known as chayote, see photos here. Choko is low FODMAP for fructans at 1/2 cup (84 g, The Monash University Low FODMAP App, 2018)

Instructions
  1. Thaw pastry in fridge within 24 of making sausage rolls
  2. Remove pastry from fridge 20 mins before rolling out and allow to warm to room temperature
  3. Preheat oven to 200 deg C
  4. Rinse dark green tips of leek and chop finely
  5. Chop thick skin off choko and remove the core. Grate the choko.
  6. For moderate salicylate sausage rolls, peel the carrot and then grate it
  7. Combine the two types of mince, salt, dried chives, green tips of leek, grated choko and, in the case of moderate salicylates, the carrot
  8. Beat the egg and SoGood soymilk
  9. Roll out each packet of pastry as thinly as you can, ideally to 30 cm x 30 cm
  10. Cut the pastry sheet into two equal rectangles
  11. Place one quarter of the mince mixture along the pastry sheet lengthwise, about 3 cm in from the edge
  12. On the opposite long edge score the pastry with a fork and then brush with the egg mixture
  13. Roll the sausage roll up, starting from the side closest to the mince mixture and ending on the scored side. There should be an overlap of several cms of pastry and the scored pastry should end up on the bottom side of the sausage roll
  14. Brush the top and sides of the pastry with the egg mixture
  15. Cut the sausage roll in half
  16. Repeat for the remainder of the pastry and mince mixture
  17. Place the sausage rolls on a baking tray lined with baking paper with at least 1 cm around the sausage roll
  18. Bake at 200 deg C for about 35 mins, or until pastry is golden brown and the inside is cooked through
  19. Serve immediately or freeze immediately to prevent amine build-up
Personal Notes

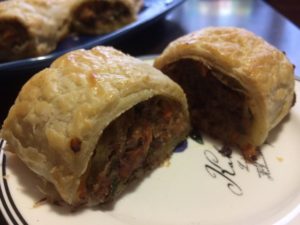
I’ve been wanting to try sausage rolls with choko instead of apple for a while now, but then chokos went out of season and my new greengrocer doesn’t stock them. But I paid a visit to South Melbourne Market and was rewarded with big, juicy chokos, so they are back on the menu for now! Just be careful with how many sausage rolls you eat – 84 g of choko is low FODMAP but it becomes high for fructans by 168 g (The Monash University Low FODMAP Diet App, 2018). One large sausage roll is low FODMAP and enough for lunch. If you are going to have it for a main meal, I would add a salad as a side – for example the friends-and-family friendly salad.

I cooked my sausage rolls for 35 mins but they were at the bottom of the oven for most of that time, so I suspect they would need less time at the top of the oven – best to keep an eye on them after 20 mins. As much as it is tempting to cut the sausage rolls up and make party sausage rolls, the mince mixture does brown on the ends and this is minimised by cooking large sausage rolls – see the photo of the party sausage rolls I attempted below. If you want party size rolls, I would recommend cutting them up with a sharp knife after cooking. The sausage rolls freeze quite well, although the pastry is slightly soggy on defrosting.

My brother was visiting for a weekend and having some friends over to my place so we cooked these sausage rolls. He made some “normal” ones and I made these, and I definitely didn’t feel like I was missing out! The choko keeps the sausage rolls moist, so they are still nice to eat even without tomato sauce.

Coffee and Carob Cake


Time: 1 hr
~ low FODMAP ~ failsafe ~ low salicylate ~ low amine ~ dairy free ~ gluten free ~

Ingredients

Cake
125 g Nuttelex Original
2/3 cup brown sugar
1/3 cup caster sugar
1/2 cup SoGood soymilk
2 tsp decaf instant coffee powder
1 tbsp carob powder
2 eggs
1 1/2 cups Orgran gluten free flour

Icing
1 cup pure icing sugar
2 tbsp Nuttelex Original
1 tbsp SoGood soymilk
1/2 tsp decaf instant coffee powder

Instructions
  1. Preheat oven to 180 deg C
  2. In a large saucepan, combine sugars, Nuttelex, soymilk, decaf instant coffee powder and carob powder
  3. Stir on low heat until Nuttelex has melted
  4. Allow mixture to sit for 10 mins
  5. Add flour and eggs to the mixture and mix together, first using a wooden spoon and then an electric mixer. The batter should be thin and smooth
  6. Line a square or circular cake tin with baking paper and grease the sides with Nuttelex
  7. Bake for 35 min at 180 deg, or until a skewer inserted into the cake comes out clean
  8. Sift 1 cup of pure icing sugar and mix in 2 tbsp Nuttelex
  9. Heat 1 tbsp of soymilk in the microwave on low heat
  10. Dissolve 1/2 tsp decaf instant coffee powder in soymilk
  11. Slowly add coffee soymilk to icing and Nuttelex mixture until icing reaches the desired consistency, add more soymilk if required
  12. Once the cake has cooled to the touch, ice with coffee icing
Personal Notes

This cake is based off the melt and mix coffee cake in Sue Dengate’s The Failsafe Cookbook. The carob gives a slight spicy taste and adds interest to the flavour of the cake, and carob powder is low FODMAP at 1 heaped tsp, or 6 g (The Monash University Low FODMAP Diet App, 2018) so as long as you don’t consume more than 1/4 of the cake in one sitting, it will be low FODMAP! It is so good you might want to though! I like this cake best when it is cooked but still moist inside, rather than the drier, crumbly texture of some cakes. I made this cake for my housewarming party along with the lemon and poppy seed cake and it was also demolished in record time.

Lemon and Poppy Seed Cake

Time: 1 hr
~ low FODMAP ~ failsafe ~ low salicylate ~ low amine ~ dairy free ~ gluten free ~

Ingredients

Cake
175 g Nuttelex Original
3/4 cup white sugar
1/2 tsp citric acid
3 eggs
1 1/2 cups Orgran gluten free self-raising flour
1 tsp xanthan gum
1 tsp gluten free baking powder
1 tbsp poppy seeds

Icing
1 cup pure icing sugar
2 tbsp Nuttelex Original
1 tbsp hot water
1/2 tsp citric acid

Instructions
      1. Preheat oven to 180 deg C
      2. Cream Nuttelex and sugar until light and fluffy
      3. Add 1/2 tsp citric acid to the Nuttelex and sugar
      4. In a second bowl, beat eggs until frothy, idealling using an electric mixer
      5. In a third bowl, sift together flour, xanthan gum and baking powder
      6. Add egg and flour mixtures alternately to Nuttelex and sugar, using a wooden spoon to mix. The final mixture should be very thick.
      7. Stir poppy seeds through batter
      8. Line a rectangular cake tin with baking paper and grease sides with Nuttelex
      9. Spoon the batter into the cake tin and spread out with a spatula. The mixture should be firm and have to be pushed into place
      10. Bake for 40 mins at 180 deg C. A skewer inserted into the cake should come out dry
      11. Leave the cake in the tin for 10 mins, before cooling on a rack
      12. Sift 1 cup of pure icing sugar and mix in 2 tbsp Nuttelex
      13. Dissolve 1/2 tsp citric acid in 1 tbsp boiling water
      14. Slowly add water to icing and Nuttelex mixture until icing reaches the desired consistency. Usually the whole tbsp of water is required
      15. Once the cake has cooled to the touch, ice with citric icing
    Personal Notes

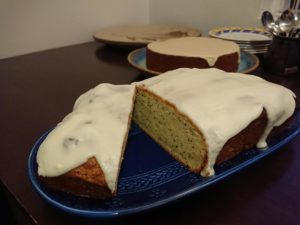
    This recipe is based off the Madeira Cake in Sue Dengate’s The Failsafe Cookbook, which is one of my all-time favourite cake recipes. I’ve tried to make this cake slightly more lemon-flavoured and of course I have added the poppy seeds too, as citrus (traditionally orange) and poppy seed cake is an old favourite. I made this for my housewarming party and it disappeared very quickly!

Toad-in-a-Hole Pancakes


Serves 1
Time: 5 mins
~ low FODMAP ~ failsafe ~ low salicylate ~ low amine ~ dairy free ~ gluten free ~

Ingredients

1 cooked buckwheat pancake (recipe here)
1 egg
1 tsp canola oil (a)
1 pinch salt
3 chives

Foodnotes

(a) Use canola oil that has no antioxidants (no 310-312, 319-321)

Instructions
  1. Heat canola oil in a small frying pan on moderate-high heat
  2. Using a large glass cut a hole out of the centre of the pancake
  3. Place the pancake into the frying pan and then crack the egg into the hole
  4. When the egg white has almost finished solidifying, flip the egg and pancake over to seal the other side. Cook until the egg shite has completely solidified
  5. Serve immediately with a sprinkle of salt and fresh chives
Personal Notes

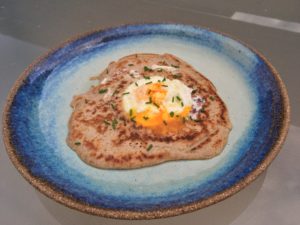
I made this recipe up in a fit of inspiration when I came home hhungry and couldn’t wait to cook dinner. I also happened to have buckwheat pancakes and eggs in the fridge. It is quite filling for a snack, so I imagine they would also make a yummy cooked breakfast for something different.

Beef Burgers

Makes 16 patties, Serves 8
Time 30 mins
~ low FODMAP ~ failsafe ~ low salicylate ~ low amine ~ dairy free ~ gluten free ~

Ingredients – Beef Patties

560 g fresh beef mince (a)
130 g tinned chickpeas (b)
2 eggs
1/2 cup Orgran plain gluten free flour
10 g / 8 dark green spring onion tips (c)
1/2 + 2 tsp salt
1/2 tsp dried chives
Approximately 1 cup of quinoa flakes or rice crumbs

Ingredients – For Each Burger

Low FODMAP, failsafe bread roll (d)
Nuttelex Original
Iceburg lettuce
Red cabbage (e)
Fried egg
Peeled, grated carrot (moderate salicylate option)

Foodnotes

(a) Ensure very fresh meat (as instructed by dietician)
(b) Tinned chickpeas, well rinsed, are low FODMAP at 1/4 cup (42 g, The Monash University Low FODMAP Diet App, 2018)
(c) Tip: re-grow spring onions
(d) Low FODMAP, failsafe bread rolls can be made from Well and Good Crusty Bread Mix, warm water, canola oil and rice flour. Preparation of the rolls takes 1 h 30 min in total. The bread mix is available online from Gluten Free Direct – Order here.
(e) Red drumhead cabbage is low FODMAP at 1 cup (89 g, The Monash University Low FODMAP Diet App, 2018)

Instructions
    1. Drain and rinse tinned chickpeas well
    2. Place the chickpeas in a large bowl and mash them with a fork
    3. Rinse the dark green tips of spring onions and chop finely
    4. To the chickpeas add beef mince, 2 eggs, spring onion tips, 1/2 tsp salt and 1/2 tsp dried chives. Mix well
    5. To the meat mixture, add flour slowly, mixing well. The resulting mixture should stay together when rolled in balls
    6. Prepare a bowl filled with rice crumbs or quinoa flakes. Prepare a plate for the uncooked beef patties
    7. Take a small handful of beef mixture, about 1/3 cup in volume, and roll into a ball, then squash until it is only 1 cm thick. Place the pattie in the bowl of quinoa flakes or rice crumbs and coat well. Place the uncooked pattie on the prepared plate
    8. Beef patties can be cooked one of two ways. If you have the use of a BBQ, beef patties can be cooked on te BBQ using non-stick BBQ liners to minimise meat browning. Seal on each side and be careful not to brown the meat but cook it through. Cooking on a BBQ takes about 10 min
    9. If you do not have the use of a BBQ, beef patties can be cooked in a frying pan on the stove. Heat the frying pan to medium-high heat and sprinkle 1/2 tsp on salt into the pan. Place the patties in the frying pan, cook for 3 mins on each side, shaking the pan to redistribute the salt when flipping. Cook for up to another minute on each side or until the beef patty is no longer pink when cut.
    10. While the patties are cooking, rinse the lettuce and red cabbage and tear into small pieces.
    11. In the hot pan or on the BBQ after cooking the beef patties, fry the eggs for the burgers
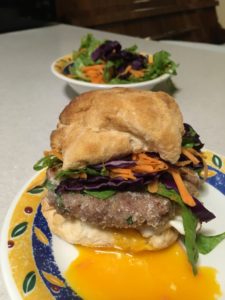
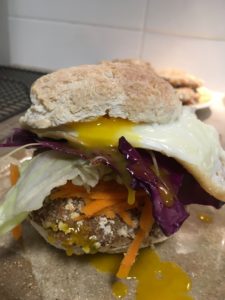
    12. Assemble the burgers immediately before eating. Butter the bread roll and put beef pattie, iceburg lettuce, red cabbage and fried egg in the burger. Any burgers not eated immediately should be frozen immediately as they contain meat and eggs. Eggs should be fried fresh if the defrosted burger is eaten on another day.
    Personal Notes

    Firstly, thanks for being patient in waiting for my latest post. I moved house and life got a bit crazy, so I reverted to my staples of schnitzel and roast vegetables, basic pasta sauce and chicken stir-fry or beef stir-fry and didn’t try any new recipes, or take the time to weigh ingredients. My PhD is also pretty full-on at the moment, lots of nights where I don’t start cooking until late.

    Unfortunately, cooking late with other things on your mind can lead to mistakes! Before Easter I badly burnt myself on the oven, and tonight I forgot to add canola oil to the bread mix – which I realised as soon as I took the rolls and loaves out of the oven and saw that they were small and looked strange! You can see in the photo below the rolls look different to the ones at the top of the page. Oops! I guess we all make mistakes, and luckily the burgers tasted good anyway, and that’s what matters.

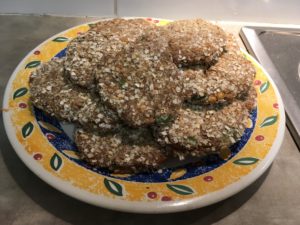
    I prefer to make these burgers with rice crumbs and use the BBQ, but as a result of moving house, I don’t have either of these two on hand. The image at the top of the page is of the same burgers that I made at my old place using the BBQ and rice crumbs. Tonight I used the frying pan, which also worked well as it is a bit easier to keep an eye on them and make sure they don’t go dry (see photo below).  Using a pan can slow down the cooking process depending on how many patties you can fit in the one pan – in my case it took 3 batches to cook all the patties. The rice crumbs provide a better coating to prevent meat browning, but the quinoa flakes also seemed to work fine.

    Finally, choko chutney is a nice addition to the beef burger, especially if you have the burger without the egg as the egg yolk acts like a sauce. Once chokos are back in season, I will publish a recipe for choko chutney.

Buckwheat Pancakes


Makes 7 pancakes

Time: 1 hr 20 mins
~ low FODMAP ~ failsafe ~ low salicylate ~ low amine ~ dairy free ~ gluten free ~

Ingredients

225 g buckwheat flour
1 1/2 tsp gluten free baking powder
1 3/4 cups SoGood soy milk
2 eggs
1 pinch salt
1/4 cup Nuttelex Original
100% pure maple syrup

Instructions
    1. Beat soy milk and eggs together with a fork
    2. Combine buckwheat flour and baking powder
    3. Gradually sift flour mixture into soy milk and eggs mixture, mixing well.
    4. Add a pinch of salt to the mixture and stir.
    5. Cover the mixture and allow to sit for 1 hr.
    6. Heat 1 tbsp of Nuttelex Original into a frying pan on medium-high heat.
    7. Add one ladle-full of batter to the frying pan. Move the frying pan to spread the batter out thinly.
    8. Cook until the mixture solidifies around the edges, then flip the pancake over, adding one more Nuttelex to the pan. Cook until the pancake is golden on both sides.
    9. Continue cooking pancakes until all the mixture is finished.
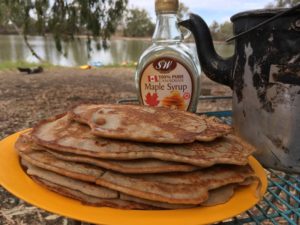
    10. Serve with pure maple syrup.
Personal Notes

My family, and a few of our close family friends go on an annual camping trip, almost like a pilgrimage to the same campground each Easter. As the first year on the on failsafe + low FODMAP + dairy free + wheat free diets the challenge was to still be able to go camping without having to rely on my usual technique of freezing food. The solution was to go vegetarian for a few days, keep my own box of non-perishable food and a bag in the esky of perishable food.

These buckwheat pancakes were for for brunch but I often make them at home for breakfast, dessert, a snack (especially good when I come home hungry) or for a carbohydrate source to go with a pasta sauce. These were also enjoyed by my family who are on “normal” diets.

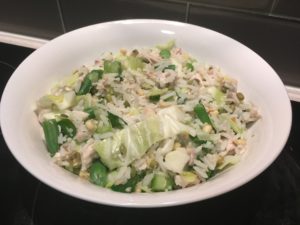
Fried Rice


Serves 4
Time: 30 min
~ low FODMAP ~ failsafe ~ low salicylate ~ low amine ~ dairy free ~ gluten free ~

Ingredients

500 g cold cooked rice (a)
60 g / 2 sticks celery
90 g sprouted mung beans
120 g green beans, fresh or frozen (c)
230 g green drumhead cabbage (d)
240 g cooked chicken pieces (e)
20 g / 1/2 bunch of dark green spring onion tips (f)
1 tbsp golden syrup (g)
3 eggs
3 tbsp canola oil (h)
1/2 tsp salt

Foodnotes

(a) Avoid basmati, jasmine or wild rice which are moderate in salicylates (RPAH Elimination Handbook, 2011). I used long grain white rice.
(b) Celery is low FODMAP at 75 g (FODMAP Friendly App, 2018)
(c) Green beans are low FODMAP at 14 beans (75 g, FODMAP Friendly App, 2018).
(d) Green drumhead cabbage is low FODMAP at 1 cup (94 g, The Monash University Low FODMAP Diet App, 2018)
(e) Meat should be fresh when cooked and either used the same day or frozen immediately. Follow dietician’s advice.
(f) Tip: re-grow spring onions
(h) Use canola oil that has no antioxidants (no 310-312, 319-321)

Instructions
  1. Rinse celery, sprouted mung beans, green tips of spring onions, green beans and cabbage.
  2. Finely chop celery, green tips of spring onions and cabbage. Chop green beans
  3. Heat 1 tbsp of canola oil in a wok on medium-high heat.
  4. Beat eggs together with 1/4 tsp salt
  5. Cook eggs in wok until very dry
  6. Add celery, sprouted mung beans, green beans, cabbage and remaining 1/4 tsp salt to the wok and stir fry for 3-5 mins until celery is soft. Add canola oil as required to stop food sticking to the wok.
  7. Add cold rice to the wok and stir until warm and well-mixed.
  8. Slice chicken and chop into small pieces.
  9. Add chicken and green tips of spring onions to the wok.
  10. Cook for a further 5 min
  11. Mix 1 tbsp golden syrup with 4 tbsp hot water
  12. Remove wok from the heat and stir through golden syrup mixture.
  13. As this recipe contains meat, serve immediately or freeze immediately.
Personal Notes

This recipe is based off Brigid’s Indonesian-style fried rice from Sue Dengate’s The Failsafe Cookbook, but modified to be low FODMAP.

I think the key to fried rice is having relatively dry cooked rice rather than gluggly. If you don’t have time to prepare the rice multiple days ahead, you can still do it on the same day. I cooked my rice in the morning and then used it in the evening. After my usual 10 mins of absorption, I left the rice on low heat on the stove until the rice at the bottom was dry and starting to stick to the saucepan. I then put it in a large bowl, spread it up the sides and left it to cool uncovered while I got ready in the morning. Once it had stopped steaming I covered it and kept it in the fridge until it was ready to use.

Fried rice is a nice quick dinner, and is also a good way to use up left over frozen roast chicken. You can even add left over chicken stuffing to the fried rice for extra flavour. I tried that once and it was delicious. If you don’t have sprouted mung beans they can easily be excluded, and if you tolerate moderate salicylates, you can add peeled, diced carrot in with the other vegetables at the start. I really like egg in my fried rice. I only had two eggs in the fridge this week, but I’ve bumped the recipe up to three eggs. Anywhere between two and four eggs would be fine, depending on personal preference and what is on hand.

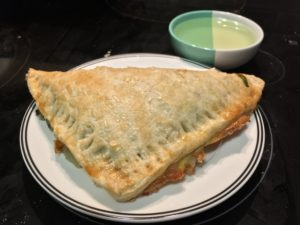
Chicken and Leek Puffs


Makes 8 triangles, serves 4
Time: 1 hr
~ low FODMAP ~ failsafe ~ low salicylate ~ low amine ~ dairy free ~ gluten free ~

Ingredients – Puffs

2 x 400 g boxes Genius Gluten Free Puff Pastry (a)
300 g diced chicken thighs (b)
45 g dark green tips of leek (c)
12 g / 6 dark green spring onion tips (d)
1/2 cup homemade chicken stock
1 tbsp canola oil (e)
1/8 tsp citric acid
1/2 tsp salt
2 tbsp gluten free cornflour (f)
rice flour for dusting
1 egg

Ingredients – optional dipping sauce

120 mL water
1 tsp citric acid
2/3 tsp salt
2/3 cup white sugar

Foodnotes

(a) Genius Gluten Free Puff Pastry can be found in some Coles supermarkets.
(b) Ensure very fresh meat (as instructed by dietician).
(c) Dark green tops of leeks are low FODMAP. They are also slightly higher in salicylates than the white part although suitable for failsafe elimination. Tip: re-grow leeks and spring onions.
(d) Use canola oil that has no antioxidants (no 310-312, 319-321).
(e) Use gluten free cornflour, also known as cornstarch, which is a fine white flour. Corn flour from wheat contains wheat and gluten while yellow corn flour or maize flour is higher in salicylates.

Instructions
  1. One day before making chicken and leek puffs, defrost pastry in the fridge
  2. Remove pastry from the fridge and allow to warm to room temperature
  3. Preheat oven to 180 deg C (fan forced)
  4. Rinse dark green tips of leek and dark green tips of spring onion. Chop finely, keeping separate.
  5. Cut the diced chicken into smaller pieces
  6. Heat 1 tbsp canola oil to a small frying pan over medium-high heat
  7. Add the chicken to the pan, and stir continuously until the chicken is sealed, about 5 min
  8. Add the leek to the pan and cook until leek is soft, about 2 min
  9. Mix cornflour in with half of the chicken stock and make a slurry
  10. Add chicken stock, cornflour/stock mixture, citric acid and salt to the frying pan. Mix well
  11. Turn the frying pan down to medium heat and cook until the mixture has thickened. The mixture should be creamy with minimal liquid.
  12. Roll out each sheet of puff pastry to a 20 cm x 20 cm square.
  13. Using a sharp knife, cut each sheet of pastry into four 10 cm x 10 cm squares.
  14. Spoon the chicken mixture onto one triangular side of each small square of pastry. Do not overfill.
  15. On each square, fold the pastry over to form a triangle and seal the edges by pressing with a fork. This may be necessary on both sides.
  16. Beat the egg in a cup and lightly brush over the pastry with a pastry brush. If you don’t have a pastry brush, a piece of folded paper towel also works.
  17. Place the chicken and leek puffs on an oven tray lined with baking paper, and bake at 180 deg C for 25 min.
  18. Serve immediately as an entree, snack or main course, with optional dipping sauce. If you don’t eat them immediately, freeze them immediately as they contain meat.
  19. To make optional dipping sauce combine ingredients in a saucepan, simmer on high heat for 1 minute with regular stirring.
Personal Notes

I have to thank one of my colleagues for the idea for this recipe. He was surprised that I made a lamb, leek and lentil pie when his usual recipe was for chicken and leek pie. I didn’t realise chicken and leek were so commonly paired together! So I came up with this recipe – I’m sure it could also be used to make a pie with either Genius gluten free puff pastry or shortcrust pastry. When I made these I actually only had one packet of the puff pastry on hand, and I couldn’t fit all the mixture in the puffs. I ended up eating the filling on its own, which also tastes good. You could eat half the filling at once and it would still be low FODMAP and failsafe – the only significant FODMAP-containing ingredients are the green tips of the leek (safe at 28 g, The Monash University Low FODMAP App, 2018) and the homemade chicken stock, which contains green tips of leek and celery (low FODMAP at 75 g, FODMAP Friendly App, 2018).

The dipping sauce is an adapted recipe from Thai Cooking Class by Somi Anuntra Millar and Patricia Lake, it has a lot of sugar in it but is a nice addition, especially if you serve the puffs as a party snack. The original recipe poured the dipping sauce over finely chopped carrot, cucumber and coriander. I haven’t tried it yet, but if you tolerate moderate salicylates, you could pour the dipping sauce over very finely chopped peeled carrot and peeled cucumber. I tried to make a potato bake to go with the puffs but it did not turn out well – a bit of optimising is required on that recipe before I share it!

This week we had an event at Uni for International Women’s Day – there was a talk from a eminent international Chemistry professor and a shared lunch with the other female students. It was great to put some names to faces in the School and meet some new people. I brought along these chicken and leek puffs and fit right in having a delicious lunch while the others had pizza.